It’s easy to run Behat when you’re SSH-ed into your Vagrant machine, but it can take a long time when you have quite a few scenarios. Unfortunately, you can’t specify a scenario by its name, only its line number. Luckily, PHPStorm has a nice interface for test suites, and in their early access program, Behat support has been added.
This will let you select a feature or scenario to run individually, which is great when you’re developing everything locally.
But because your project is running on a virtual machine, it’s not as simple as pressing the Run button. You could download the behat.phar file, as hinted by one of PHPStorm’s configuration menus, and most scenarios will run fine. This method is limited, however, when databases, connections and fixtures become involved.
Since you’re running your application in a virtual machine, all of its databases are inaccessible outside of this scope (unless you specifically set it up to accept incoming connections). Isn’t the point of a Vagrant machine to be able to have a self-contained development environment that is agnostic to your host computer’s OS and settings?
There are several stages involved with getting Behat running in PHPStorm, through your Vagrant box.
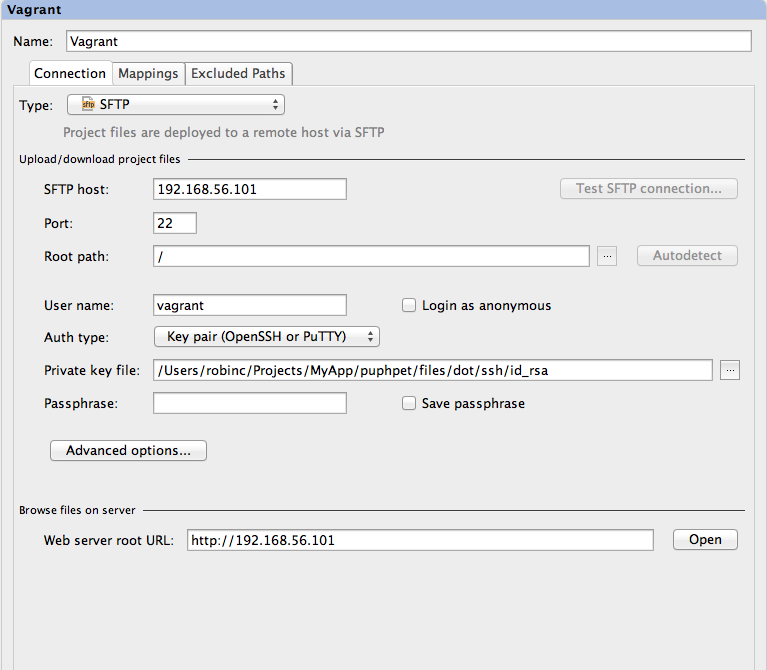
Open Project Settings > Deployment, and create a new SFTP entry, and enter your Vagrant machine’s SSH details:

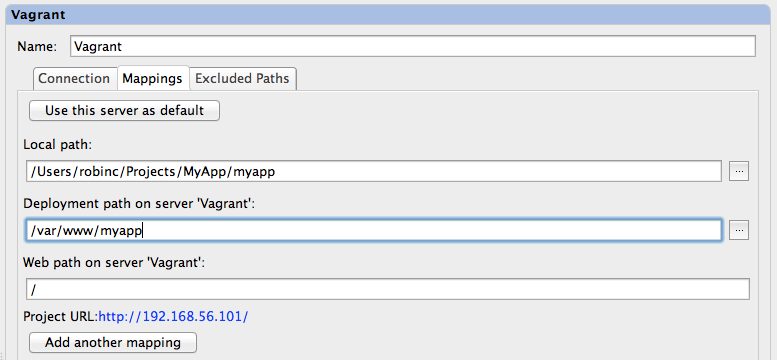
On the Mappings tab, ensure there is a path mapped from your local application root, to the application root on your vagrant machine, under Deployment Path on Server….

Once you’ve done this, we need to set up a Remote Interpreter. Instead of PHPStorm running the php command locally, we can configure it to run the php command on the vagrant machine via SSH. This enables PHPStorm to run Behat as though it’s running on the same system. Follow these steps:
- Go to
Project Settings>PHP - Press the ellipsis button on the right of the Interpreter drop-down menu. This will bring up the interpreter’s settings.
- Click the
+button and chooseRemote. - Click the
Fill form deployment server settings. This will grab the SSH settings we entered earlier, and automatically enter the location of the PHP executable. Save this by clickingOK. - Now choose your new remote interpreter from the drop-down menu and click
OK.

Firstly, behat.yml will need to be configured to point to your application’s FeatureContext by its fully-qualified name. Also, the path of the features directory, relative to the application root needs to be defined:
Once behat.yml is configured, we can set up Behat for PHPStorm. Go to Project Settings > PHP > Behat. Press the + buttons and choose Remote Interpreter. Here you will need to enter the directory to the Behat file (download from composer or behat.phar) and the path of your behat.yml configuration file.

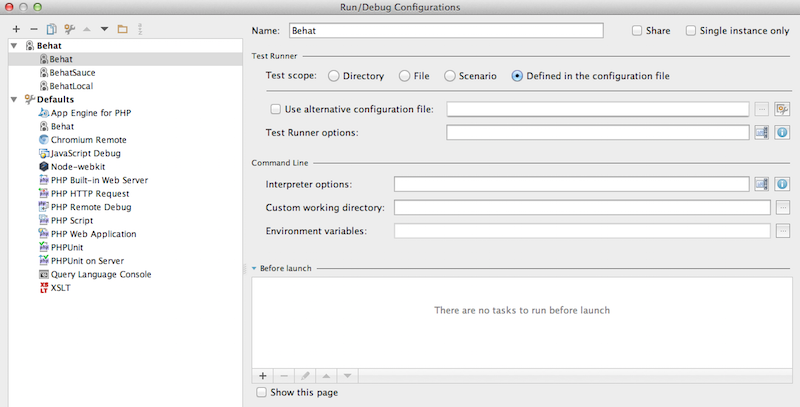
Finally, you will need to create a run configuration for behat. Open Run > Edit Configurations panel, and press the + button, choosing Behat from the menu. Ensure Defined in the Configuration File is selected under the Test Runner option and press OK.

That’s it! Choose your Behat run configuration and click Run. PHPStorm will open the Run panel, and will run through each feature and scenario. From here, individual features or scenarios can be run.